Orchid photography and image composition
The orchid photography season in Sardinia begins as early as March. Numerous wild orchids then appear in the meadows and under the olive trees. The first species of the year is always the Barlia (Barlia robertiana ). It appears as early as January. Reaching a height of up to 80 cm, it is the largest of the local orchids and impossible to miss.
But things really get going in April. That’s when many of the 56 wild orchid species found in Sardinia bloom. This year, some were even earlier. Not far from Cuglieri, I found four species in March that, despite wind and weather, sprouted and opened their flowers. Among them were
Ophrys tenthredinifera and Ophrys morisii from the genus Ophrys, whose tiny flowers are barely noticeable among grasses and shrubs. (For the number and names, I followed the reference book “Orchide in Sardegna” by Antonia Pessei, Ilisio Edizioni 2017. )
Canon EF 180mm at f8 and 1/350 sec
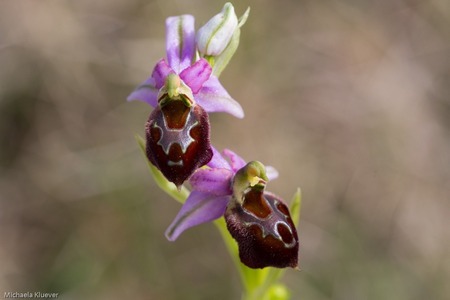
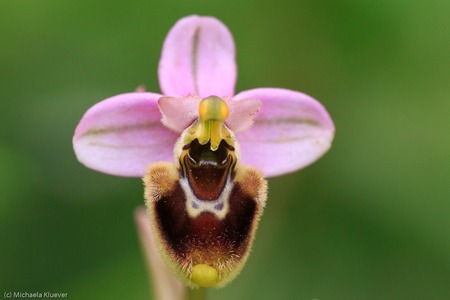
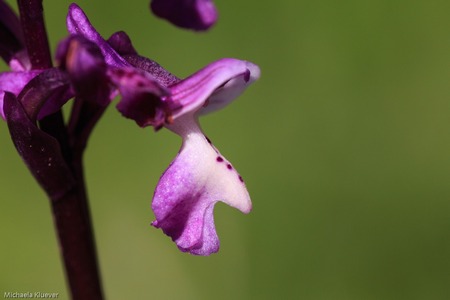
Colors and shapes vary and change in bee orchid species from flowering to wilting. Drought, wind, or rain can cause deformations. Whether photos were taken under overcast skies or sunshine can also make a difference. In the latter case, parts of the characteristic markings reflect light, the colors change, and become more intense (see images 2 and 3). Two photos of the same flower can easily appear to someone who wasn’t present when they were taken as photos of two different species. Hybrids and apochromatic forms add further uncertainty to identification. I simply find this richness of form and color in nature beautiful and can easily accept that individual plants are not precisely identifiable for me.

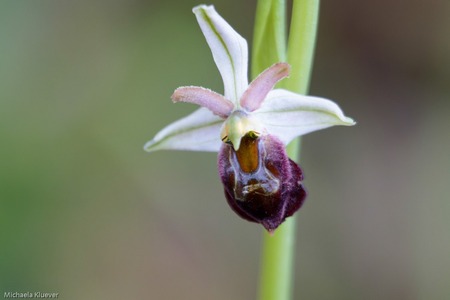
Ophrys tenthredinifera
Ophrys tenthredinifera,
Canon EF 180mm at f8 and 1/350 sec
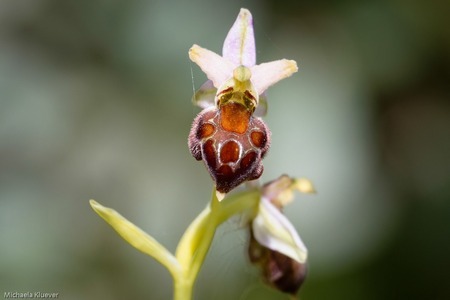
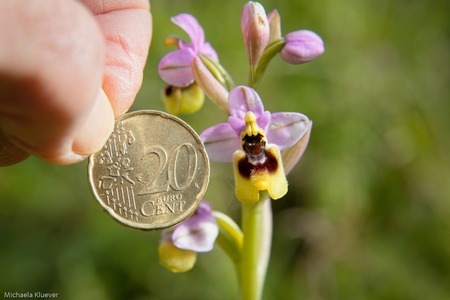
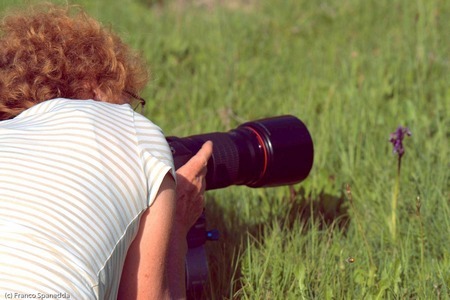
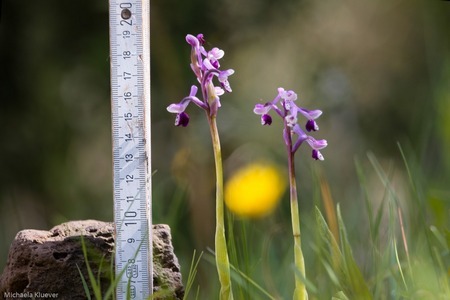
Their beauty only becomes visible in detail, in a macro photograph. The 20-cent coin at the top of image 6 has a diameter of 20 mm. A full-frame sensor has an area of approximately 24 x 36 mm². Therefore, a 24 x 36 mm² object photographed to fill the frame corresponds to a 1:1 magnification ratio. The maximum achievable depth of field, which depends on the magnification ratio, is in the millimeter range for such tiny subjects. For any detail to be recognizable in the photograph, the sensor plane must be aligned with millimeter precision parallel to the desired focal plane of the object. This is a real fiddly task when aligning the camera and tripod. At f/8, and occasionally f/5.6, the focus on the important parts of the image is just about acceptable for me. The shooting data for two of these subjects is shown as examples in images 2 and 7.
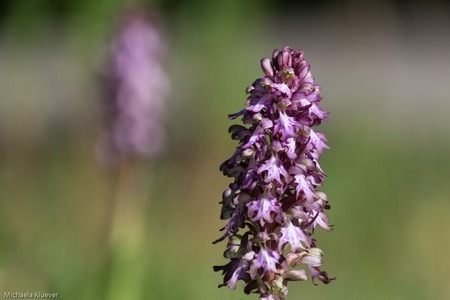
Over the past few years, I’ve been able to photograph many orchid species in Sardinia, plus some suspected hybrids and various unidentified ones. You can find a selection in my gallery “Orchids in Sardinia .” I love the little figures that can be discovered in the blossoms with a macro lens: tiny men with outstretched arms, wings, horns, caps, smiling faces, or sad expressions. But ultimately, these are documentary photos. For the technical reasons described, there’s little room for creative interpretation.
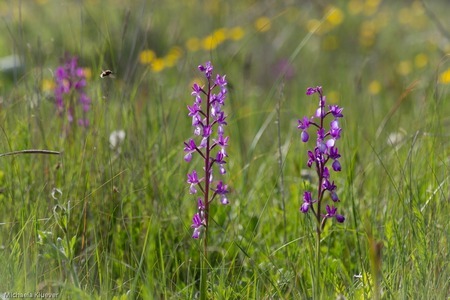
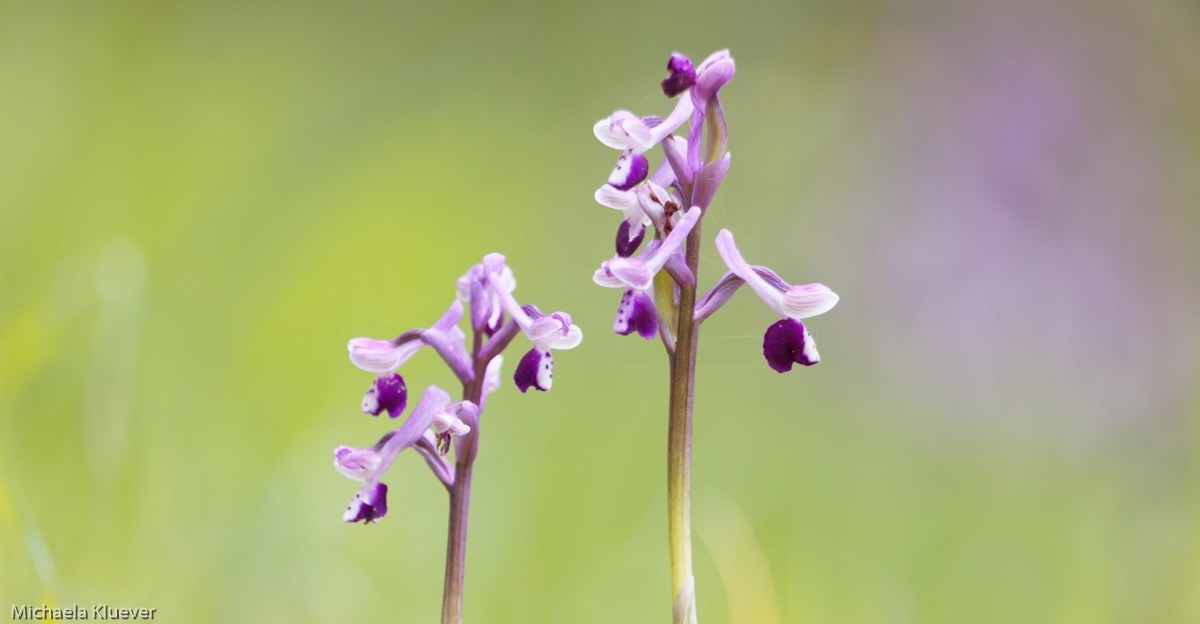
To capture the aesthetic beauty of the blossoms within their environment, I experimented with different settings while photographing orchids in Sardinia over the past few weeks. “Try the opposite of what you’ve always done” is a piece of advice for creative photography. I find this very helpful when I reach a point where I feel like I’m creatively stagnating. So, instead of getting up close to the detail with a 180mm macro lens, as in image 11 below this paragraph, I experimented with different focal lengths, extension tubes, and varying distances from the subject. My test subjects were the first Anacamptis longicornu orchids from the genus *Anacamptis* , whose height was ideal for these experiments.
The longer the focal length, the better the background can be composed due to the correspondingly smaller angle of view and shallower depth of field, allowing the main subject to stand out optimally against it. However, a completely homogeneous background landscape like in image 9 above isn’t ideal. I still wanted to include hints of grasses, raindrops, or blossoms. “Tidying up” the image by plucking out individual blades of grass or stems isn’t necessarily the best approach.
At the – provisional – end of the experiments, I’m quite pleased with the results using a 400mm focal length, sometimes with and sometimes without an extension tube, at a subject distance of 1-2 meters and f/5.6. They can be seen in the mini-gallery below. To achieve the desired blur in the “background,” I focused through some foreground grasses and leaves. The images, therefore, actually show a combination of blurred background and foreground, framing the subject. Slight overexposure can further enhance the sense of calm. I adjusted the subject distance and the decision for or against a 20/36mm extension tube to the specific foreground vegetation that I wanted to create a blurred effect around the subject.
This method works better in diffused light, i.e., under a cloudy sky, than in sunshine, because direct sunlight creates uneven light and shadow patterns in the image. Light drizzle is also suitable. The blurred raindrops add an interesting accent to the background. A light breeze can also be helpful. When the grasses move on their thin blades while the orchid remains stable with its thicker stem, this creates an additional blurring effect in the background. Below you can see the first test results. At the moment, I like the last picture best. What do you think?
See comments >